Your First Gran Fondo: What to Expect from Start Line to Finish

19 min read
Contents
- First, understand the kind of fondo you’ve entered
- Distance, climbing and cut-off times matter more than the event name
- Timed events do not always mean you need to race
- Read the rider guide before making assumptions
- Two weeks out: check your readiness without cramming
- Use your recent long rides as evidence
- Identify the weakest part of your preparation
- Know when to reconsider the distance
- The final week: reduce uncertainty, not just mileage
- Confirm registration, start time and rider instructions
- Check the bike before the final days
- Keep your meals and riding routine familiar
- Watch the weather without constantly changing your plan
- What to pack and what to leave behind
- What stays on your bike
- What belongs in your event bag
- Prepare for weather changes without carrying everything
- Event morning: from arrival to the start corral
- Registration, bike checks and getting settled
- Choosing a realistic starting group
- What happens when the bunch begins moving
- How to manage the ride from kilometre zero
- The opening 20 km: resist the excitement
- The middle of the route: hold your own sustainable effort
- The final quarter: adapt to the legs you have
- Feed stations, mechanical problems and unexpected delays
- Make each feed stop purposeful
- A puncture or mechanical issue doesn’t always end your day
- When to ask for assistance or stop
- Vancouver Island considerations
- Hilly roads demand pacing discipline
- Rain, wind and road conditions can change the day
- Modern supported rides and the region’s fondo history
- After the finish: recovery and what to learn
- Food, fluids, warmth and the trip home
- Review the ride without judging it by speed alone
- Your first-fondo readiness checklist
You’ve registered for your first gran fondo, put in the training kilometres and started wondering what actually happens when hundreds of cyclists arrive at the same start line. Where do you line up? How fast should you ride the opening hills? What happens if you miss an aid station, get a puncture or discover that your chosen group is too quick?
A gran fondo is more organised than a typical weekend ride, but you don’t need racing experience to enjoy one. Understanding the course, event procedures and decisions you’ll face along the way can make the difference between a stressful day and a memorable first finish.
First, understand the kind of fondo you’ve entered
Gran fondos are mass-participation cycling events, typically held on marked routes with some combination of traffic control, aid stations, timing and mechanical support. The experience varies considerably between organisers. Some events have competitive categories and podiums; others emphasise participation and completing a challenging distance.
A medio fondo usually offers a shorter option, while a metric century covers 100 km. Event names aren’t universal distance standards, so always check the actual route rather than relying on the category.
Distance, climbing and cut-off times matter more than the event name
Two rides advertised as approximately 100 km can demand very different levels of fitness. A relatively flat route with sheltered roads presents a different challenge from one with 1,400 metres of climbing, exposed descents and a strict finishing deadline.
Ryder Hesjedal’s Tour de Victoria illustrates the difference. Its published 2026 route information listed a 95 km option with approximately 1,400 metres of elevation gain and five aid stations. The longer 155 km option included around 2,200 metres of climbing. These were event-specific route details, not standard requirements for all fondos.
Read the elevation profile alongside the distance. Identify where the longest climbs occur, whether substantial climbing remains in the final quarter and how much time you realistically need.
Cut-off times deserve equal attention. Some organisers must reopen roads at scheduled times and may require slower riders to leave the supported course. RBC GranFondo Whistler, for example, publishes intermediate cut-offs and procedures for riders who fall behind the event’s sweep vehicle.
Calculate your expected total time using moving speed plus stops. A rider averaging 20 km/h over 100 km needs five hours of moving time. Three ten-minute stops bring the day to five and a half hours.
Timed events do not always mean you need to race
A timing chip records your performance, but it doesn’t necessarily make the event a traditional road race. Some fondos provide individual finish times while encouraging participants to ride at their own pace.
Check how timing works. Gun time begins with the official start, while chip time may reflect when your timing device crosses designated mats. Organisers can use different methods for overall results, competitive classifications and climbing segments.
For a first-timer, finishing comfortably and safely is a perfectly legitimate goal. You can record a personal time without treating every climb as a competition.
Read the rider guide before making assumptions
Your event’s official rider guide should be the main source of operational information. Don’t rely on what happened at a previous edition or another organiser’s event.
Before the final week, confirm:
- Your registered distance, route and official start time.
- Package pickup requirements and whether same-day collection is permitted.
- Start corral or wave assignments.
- Aid-station locations and available food, water and services.
- Course cut-offs, traffic arrangements and emergency procedures.
- Rules about equipment, headphones, aerobars and outside assistance.
- Weather-related changes, cancellation policies and event communications.
Save the relevant instructions on your phone, including any emergency contact number. A downloaded route is useful, but it doesn’t replace the organiser’s most recent directions.
Two weeks out: check your readiness without cramming
At this stage, the question isn’t how much more fitness you can build. It’s whether your existing preparation matches the event you’ve entered and whether any practical problems need attention.
Use your recent long rides as evidence
Look at the rides you’ve completed over the preceding month. Consider duration, climbing, fuelling, recovery and how comfortable you felt towards the end.
If you’ve completed several steady rides of three or four hours, practised eating regularly and handled comparable hills, you have useful evidence of endurance. That doesn’t guarantee a successful fondo, but it’s more informative than a single unusually fast training session.
Your longest training ride doesn’t necessarily need to equal the event distance. There is no universal final training distance that guarantees readiness, especially when riders differ in experience, pace and recovery capacity.
Don’t schedule an exhausting last-minute ride simply to prove you can cover the full distance. The fatigue may follow you to the start line.
Identify the weakest part of your preparation
Evaluate your readiness across four areas:
- Endurance: Can you sustain several hours of riding at a manageable effort without unusually prolonged fatigue?
- Fuelling: Have you practised eating and drinking during longer rides without significant digestive problems?
- Bike handling: Are you comfortable braking, descending and riding predictably around other cyclists?
- Equipment: Is your bike mechanically sound, comfortable and equipped for the course?
If all four are reasonably established, focus on rest and organisation. If one area is uncertain, address it without introducing excessive training load. For example, a short, easy group ride may help your confidence more than another hard interval session.
Know when to reconsider the distance
A shorter route may be the better choice if you’ve missed much of your preparation, cannot meet the likely course cut-offs or remain uncomfortable with the required climbing and descending.
Contact the organiser to ask whether switching distances is permitted. Don’t assume you can change routes during the event without authorisation.
Recent illness, injury or symptoms that could affect safe participation deserve appropriate medical advice rather than an improvised effort to catch up on training. Withdrawing from an event is preferable to knowingly starting in unsafe circumstances.
The final week: reduce uncertainty, not just mileage
The last week is primarily about arriving rested, organised and familiar with everything you’ll use. Training volume generally decreases during a taper, while some short rides may remain to maintain routine. Follow your established plan rather than suddenly copying someone else’s final-week schedule.
| When | Main task | Don’t leave until event morning |
|---|---|---|
| 14 days out | Review course demands, recent training and mechanical readiness. | Major bicycle repairs or decisions about changing distance. |
| 7 days out | Reduce training load, confirm registration details and organise transportation. | Discovering where package pickup takes place. |
| 48 hours out | Check forecast updates, charge devices and prepare familiar food. | Buying untested nutrition or essential equipment. |
| Evening before | Lay out clothing, attach event numbers and pack the bike and event bag. | Searching for tools, documents or charging cables. |
| Event morning | Eat your familiar breakfast, check tyres and brakes, and arrive with time to spare. | Changing your pacing strategy because of excitement. |
Confirm registration, start time and rider instructions
Check the latest event email rather than relying solely on the details you received when registering. Package collection, route changes and parking arrangements may have been updated.
If you’re travelling from outside Victoria, account for traffic, parking and the time needed to unload your bicycle. Confirm whether the start and finish are at the same location. For point-to-point events, your return transportation may require more planning than the ride itself.
Check the bike before the final days
Inspect tyres, brakes, drivetrain, wheels and shifting well before the event. If servicing is needed, arrange it early enough to complete a short test ride afterwards.
A new saddle, unfamiliar tyres or a last-minute drivetrain adjustment can create problems that weren’t present during training. Ideally, your final equipment setup should already be familiar.
Keep your meals and riding routine familiar
Eat regular meals that support your activity and include familiar carbohydrate-rich foods. Avoid experimental supplements, unfamiliar energy products or an oversized pre-event dinner.
Breakfast timing is personal. Choose foods and portions you’ve tolerated before longer rides, allowing enough time for comfortable digestion. Prepare your first ride snacks so they remain accessible after the start.
Prioritise consistent sleep during the preceding week. A restless night immediately before an exciting event doesn’t automatically erase weeks of preparation.
Watch the weather without constantly changing your plan
Check Environment and Climate Change Canada forecasts and official event updates. Pay attention to wind, precipitation and temperature changes over the hours you’ll be riding.
Make one sensible clothing plan with an appropriate backup. Repeatedly changing your entire equipment setup based on small forecast fluctuations usually creates more uncertainty than it resolves.
What to pack and what to leave behind
Pack enough to handle normal riding needs and common mechanical problems, but don’t turn your bicycle into a mobile workshop. What belongs on the bike depends on the course, expected time and support arrangements.
The right kit depends on whether the event offers mechanical support and how much time you expect to spend on the course. For a more detailed breakdown, packing for a 100 km ride starts with those two questions.
What stays on your bike
Carry a correctly fitted helmet, water bottles, familiar ride food, a charged phone, identification and a payment method. Your repair kit should include a compatible spare tube, inflation equipment, tyre levers and basic tools you know how to use. Tubeless riders may need suitable plugs and an emergency tube.
Use lights when required and consider them for poor visibility. Check GPS battery life and load the current route. Secure all bags, bottles and accessories before riding.
What belongs in your event bag
Dry clothing, comfortable shoes, a towel, spare food and charging equipment can stay in your vehicle or permitted event bag. Check whether bag storage is provided and where you’ll collect your belongings afterwards.
For a point-to-point event, confirm how belongings reach the finish. Never assume the organiser will transport unattended items.
Prepare for weather changes without carrying everything
A packable rain shell, gilet or arm warmers may be enough for unsettled conditions. Persistent cold rain requires more substantial protection, while warm weather calls for lighter, breathable clothing.
Prioritise garments you’ve tested on longer rides. A jacket that feels comfortable standing outside may become too warm on a sustained climb.
Event morning: from arrival to the start corral
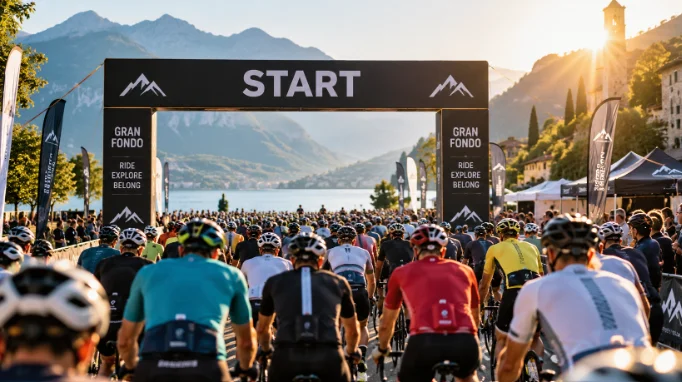
Arrive early enough to move through the event procedures without rushing. Exact arrangements vary, but most organised fondos involve some combination of registration checks, start-area preparation, toilets, announcements and controlled departures.
Registration, bike checks and getting settled
Collect your event package according to the published instructions and attach your rider number or timing device correctly. Some organisers require specific placement for timing or identification.
Before entering the start area, check tyre pressure, brakes, bottle security and your GPS route. Visit the washroom and make sure you can access your first food and drink.
Listen for announcements about road conditions, delayed starts or course changes. If something is unclear, ask an event volunteer before the group begins moving.
Choosing a realistic starting group
Where start corrals are assigned by expected finish time, use your training performance rather than your ideal result. A rider comfortable averaging 21 km/h over similar terrain shouldn’t automatically join a substantially faster group.
Starting conservatively reduces the pressure to chase faster cyclists and gives you more room to settle into the event.
Before you roll away from the start, make sure you’re comfortable holding a predictable line and communicating around other cyclists. These group-riding skills for first-time fondo riders are worth practising before event day.
What happens when the bunch begins moving
Expect an uneven opening. Riders may accelerate, slow for junctions or reorganise as the group spreads out. Keep your head up, avoid overlapping wheels and maintain enough space to respond safely.
Don’t weave through small gaps to gain a few positions. If you’re uncomfortable with a compact group, allow more space and settle into a safer position when conditions permit.
The first kilometres aren’t the place to prove your fitness. They’re where you establish control, rhythm and confidence.
How to manage the ride from kilometre zero
Consider an illustrative 100 km fondo with 1,200 metres of climbing. This isn’t a description of any particular Vancouver Island event; it’s a practical example of how decisions change over a long, hilly ride.
The opening 20 km: resist the excitement
Fresh legs, spectators and surrounding cyclists can make your normal pace feel unusually easy. Resist the urge to chase every acceleration, particularly on early climbs.
Ride at an effort you could sustain for hours. If you’re using perceived exertion, breathing should remain controlled during easier sections. Short climbs may require more effort, but avoid turning each one into an interval session.
Begin your familiar fuelling routine early, preferably at a safe point where eating won’t interfere with handling. Don’t wait until hunger or fatigue becomes obvious.
The middle of the route: hold your own sustainable effort
Between approximately 20 and 75 km, consistency becomes more valuable than excitement. You may find a group travelling at a comfortable pace, but remain willing to let it go if the effort rises beyond what you planned.
Check your food and fluid supplies before reaching the next aid station. If you’ve practised consuming around 60 g of carbohydrate per hour, maintain that established target rather than experimenting with a much higher intake on event day. Individual needs and tolerance vary.
Use the course profile to anticipate longer climbs. Shift early, maintain a manageable cadence and avoid unnecessary surges when the gradient changes.
At around halfway, assess how you feel. Are you eating comfortably? Are your hands, back and saddle position manageable? Is your pace still sustainable? Small adjustments now may prevent larger problems later.
The final quarter: adapt to the legs you have
The last 25 km often reveal whether your early pacing was realistic. If you still feel strong, gradually increase your effort where terrain and traffic conditions permit. There’s no need for an abrupt acceleration.
If fatigue is substantial, reduce the intensity and concentrate on steady progress. Continue eating and drinking according to your established needs. Don’t stop fuelling simply because the finish seems close.
If your speed falls, reassess any approaching course cut-off. A slower finish is acceptable; ignoring safety concerns or organiser instructions isn’t.
After 100 km, the most satisfying result may be discovering that you controlled your effort well enough to enjoy the final kilometres instead of merely surviving them.
Feed stations, mechanical problems and unexpected delays
Support services make a fondo more manageable, but they don’t remove the need for basic self-sufficiency. You should know how to handle a routine puncture, locate assistance and make safe decisions if something goes wrong.
Make each feed stop purposeful
Approach aid stations carefully. Signal your intention to stop, follow designated entrances and avoid crossing other riders’ paths at the last moment.
Once stopped, use a simple routine: refill bottles, collect suitable food, assess your condition and check your next route section. A few purposeful minutes may be more useful than a lengthy stop that leaves you stiff or cold.
Don’t assume every station offers your preferred sports drink or energy products. Carry enough familiar nutrition to cover gaps between confirmed services.
A puncture or mechanical issue doesn’t always end your day
If something feels wrong, find a safe place to pull over. Move clear of the riding line before inspecting the bicycle.
A straightforward puncture may be repairable with a spare tube, tyre levers and a pump. A loose accessory may require a multi-tool. More serious faults need professional assistance.
Never continue with compromised brakes, serious wheel damage or an unsafe tyre. If you cannot fix the problem confidently, contact event support.
Use this decision guide for common disruptions:
| Problem | Immediate response | When to seek help or change plans |
|---|---|---|
| Puncture | Stop safely, inspect the tyre and attempt a familiar repair. | Tyre damage is serious or the repair doesn’t hold. |
| Missed fuelling | Reduce effort and resume familiar food and fluid intake as tolerated. | Severe symptoms develop or you cannot continue safely. |
| Heavy rain or wind | Increase following distance, slow down and use appropriate layers. | Visibility, traction or control becomes unsafe. |
| Group is too fast | Let the group go and return to your sustainable effort. | You need a safe place to regroup or recover. |
| Long aid-station delay | Check the remaining distance and official cut-off information. | You may miss a required cut-off or support services are ending. |
When to ask for assistance or stop
Stop riding if you experience chest pain, fainting, severe dizziness, confusion or other concerning symptoms. Seek appropriate medical assistance immediately; call 911 for a medical emergency. Don’t attempt to ride through significant symptoms simply to reach the finish.
Follow instructions from course marshals, medical personnel and emergency responders. A supported ride may have sweep vehicles or designated collection points, but the exact procedure depends on the organiser.
Knowing when to stop is part of sound judgement, not a failure of endurance.
Vancouver Island considerations
Southern Vancouver Island offers excellent road cycling, but riders should prepare for sustained climbs, variable coastal weather and different road conditions across relatively short distances.
Hilly roads demand pacing discipline
Routes around Victoria, Saanich, the Sooke Hills and the Cowichan Valley can include rolling terrain and significant climbing. The temptation is to attack short rises because they feel manageable early in the ride.
That approach becomes expensive over several hours. Select an appropriate gear, maintain a repeatable effort and avoid repeatedly pushing well above your sustainable intensity.
Descending deserves equal attention. Ride at a speed that allows for changing road conditions, other cyclists and unexpected hazards.
Rain, wind and road conditions can change the day
Coastal conditions can make clothing choices difficult. An early start may feel very different from a long climb or an exposed descent. Dressing for a wet gran fondo is about managing those changing conditions rather than simply choosing the warmest jacket.
Watch for wet painted markings, debris, changing visibility and crosswinds. Follow event updates and instructions rather than assuming the route will operate exactly as published.
British Columbia’s road rules generally require cyclists to obey traffic controls and ride with due care. Event-specific closures or traffic arrangements do not mean every road is automatically closed to vehicles. Follow marshals and posted controls throughout the course.
Modern supported rides and the region’s fondo history
Victoria has a history of long-distance cycling events. The Victoria Gran Fondo Doppio was established in 2010 and appeared in the Victoria International Cycling Festival’s 2014 programme, reflecting the region’s longstanding endurance-cycling culture.
That historical event should not be confused with present-day organised rides or treated as proof of a continuing event schedule.
Modern events such as Ryder Hesjedal’s Tour de Victoria illustrate how supported routes, multiple distances and organised aid stations can make long-distance cycling accessible to riders with different experience levels.
After the finish: recovery and what to learn
Crossing the finish line is exciting, but you still need to get yourself, your belongings and your bicycle home. Allow time to recover before dealing with transportation.
Food, fluids, warmth and the trip home
Move clear of the finish chute and follow volunteer directions. Drink according to your needs, eat a familiar meal or snack containing carbohydrate and protein, and change out of wet clothing if necessary.
Don’t rush into driving if you’re exhausted, unwell or having difficulty concentrating. Arrange a lift or take additional recovery time where appropriate.
Check that you’ve collected your event bag, identification and equipment. If your bike developed a mechanical issue, address it before the next ride rather than forgetting about it once the event is over.
Review the ride without judging it by speed alone
Your recorded time tells only part of the story. A brief review can reveal which parts of your preparation worked and what deserves attention before your next event.
- Pacing: Did you start too hard, or did you maintain a sustainable effort?
- Fuelling: Did you eat consistently, and did your choices agree with your stomach?
- Equipment: What did you need, and what did you carry without using?
- Group riding: Where did you feel comfortable or uncertain?
- Weather: Which clothing choices worked, and what would you change?
- Training: What specific weakness should you address before the next distance?
Your finish time is only one measure of progress. If you use digital badges and monthly distance goals to stay motivated, it’s also worth asking whether Strava challenges actually support your training before setting targets for your next event.
Try to identify two or three useful adjustments rather than creating a long list of perceived mistakes. A better pacing decision or more reliable fuelling routine may contribute more to your next ride than purchasing new equipment.
Your first-fondo readiness checklist
Before leaving for the start, confirm these essentials:
- Route: Know the distance, elevation profile, major climbs, aid stations and cut-off times.
- Registration: Confirm package pickup, rider number, timing equipment, start location and assigned corral.
- Equipment: Check helmet, tyres, brakes, drivetrain, bottles, lights, navigation and repair supplies.
- Weather: Review the latest forecast and official event notices; choose appropriate clothing and a backup layer.
- Food: Prepare your familiar breakfast, on-bike nutrition and refill strategy.
- Safety: Understand the event rules, group-riding basics, traffic controls and when to seek help.
- Support: Save emergency contacts and confirm what happens if you cannot finish.
- After the ride: Know where to collect belongings and how you and your bike will get home.
Once those details are settled, there’s little value in worrying about every possible outcome. Your first gran fondo doesn’t require perfect pacing, flawless equipment choices or a particular finishing time. It asks you to make sensible decisions over a long day, adapt when circumstances change and ride within the fitness you’ve built.
Start conservatively, take care of yourself and the cyclists around you, and give the final kilometres the attention they deserve. The finish line will feel better when you’ve had enough left to appreciate the ride that brought you there.