What to Bring on a 100 km Bike Ride: A Practical Fondo Packing List

12 min read
Contents
- Start with the kind of ride you’re doing
- Supported gran fondo versus a self-supported training ride
- Four hours on the road is different from seven
- The essentials that should be on every bike
- Helmet, lights, identification and navigation
- Bottles, food and accessible storage
- Build a repair kit you actually know how to use
- What you need for a roadside puncture
- What a multi-tool can and cannot fix
- When to stop riding and arrange a pickup
- Where everything goes
- Saddle bag versus jersey pockets
- What stays in the car or event bag
- Three example packing setups
- A supported summer 100 km fondo
- A rural Vancouver Island training loop
- A cool, wet ride with uncertain conditions
- The final two-minute bike and bag check
A 100 km bike ride is long enough for a forgotten spare tube, an empty bottle or the wrong jacket to become a genuine problem. Yet carrying half a bike shop in your jersey pockets won’t make the day any easier. The useful approach is to pack for the route, the weather and the help you can realistically expect along the way.
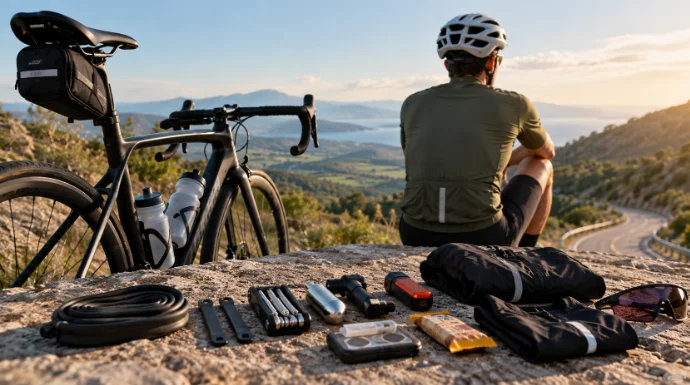
For most riders, the essentials fit into a small saddle bag, two bottle cages and three jersey pockets. The challenge is deciding what deserves that limited space.
Start with the kind of ride you’re doing
Before making a packing list, answer three questions: How long will you be riding? Where can you refill or get assistance? And what happens if you cannot finish under your own power?
A supported gran fondo with staffed aid stations is different from a solo training loop through rural Vancouver Island. Both may cover 100 km, but they require different levels of self-sufficiency.
Supported gran fondo versus a self-supported training ride
Organised fondos may provide food, water, mechanical assistance and transportation for riders who cannot continue. Never assume all four are included. Check the event’s rider guide for aid-station locations, available services and what participants must carry themselves.
If this is your first supported event, understanding what to expect at your first gran fondo will help you decide which supplies need to stay on the bike and which can remain in your event bag.
Club rides are somewhere in between. Other riders might lend a pump or help with a puncture, but that does not make them responsible for your equipment. On an unsupported ride, you need enough supplies and repair knowledge to handle common problems independently.
| Always carry | Depends on the ride | Usually unnecessary for 100 km |
|---|---|---|
| Helmet, phone, identification and emergency contact details | Compact power bank for long navigation or remote routes | Laptop-sized electronics or large charging equipment |
| Water, food and a basic puncture-repair kit | Extra food and water when refills are uncertain | Multiple spare tyres for an ordinary supported event |
| Pump or reliable inflation system, tyre levers and a compatible spare tube | Additional tube, tyre boot or tubeless plugs | Full workshop tool set |
| Payment method, route information and suitable clothing | Rain shell, warmer gloves or extra layers | Several complete changes of cycling clothing |
Four hours on the road is different from seven
Distance alone is a poor way to estimate supplies. A rider averaging 25 km/h could finish 100 km in roughly four hours of moving time. Someone averaging 17 km/h will spend almost six hours pedalling, before accounting for stops. Wind, climbing and unpaved sections can extend the day further.
For a four-hour supported ride, two full bottles and planned refills may be sufficient. For a seven-hour unsupported outing, you need a much more deliberate food and water strategy, plus clothing suitable for changing conditions.
Estimate your time conservatively. Packing for your hoped-for average speed rather than your realistic one is an easy way to run short of supplies.
The essentials that should be on every bike
Your basic kit should cover four needs: personal safety, nutrition, navigation and minor mechanical problems. Everything else earns its place according to the route.
Helmet, lights, identification and navigation
British Columbia requires cyclists to wear an approved helmet on public roads, subject to applicable exemptions. Provincial rules also require a front white light, rear red light and rear red reflector for riding during the prescribed night-time period. For long daytime rides, rechargeable front and rear lights are a sensible addition when visibility deteriorates.
Carry a charged phone, identification, emergency contact information and a payment method. Keep the phone protected from rain and sweat. If you use a GPS computer, load the route before leaving and check that its battery can last longer than your expected ride time.
A downloaded route is useful, but navigation is not the same as a backup plan. Know where you can safely shorten the ride, reach a town or arrange transportation if necessary.
For a solo ride, tell someone your intended route and expected return time. Download offline maps where possible, particularly if your route passes through areas with unreliable mobile coverage.
Bottles, food and accessible storage
Two bottle cages are a practical starting point for road cycling. A common arrangement is two 500–750 mL bottles, with refill stops planned around expected weather, effort and individual fluid needs. Carrying two bottles does not mean you have enough water for the entire ride.
Food deserves the same planning. If your established fuelling target is 60 g of carbohydrate per hour and you expect five hours of riding, that’s approximately 300 g across the supplies you carry and any confirmed aid-station food. Use a target you’ve tolerated during training rather than experimenting on event day.
Choose foods that are easy to open and eat during a safe stop or while riding where conditions permit. Bars, bananas, chews, gels and carbohydrate drink mixes can all work. The best combination is familiar, digestible and convenient.
Keep at least one snack immediately accessible. Food buried underneath tools is easy to neglect when you’re tired.
Build a repair kit you actually know how to use
A compact repair kit is more valuable than a large collection of unfamiliar tools. Before attempting 100 km, practise removing a wheel, fixing a puncture and using your inflation equipment at home.
What you need for a roadside puncture
For a conventional tyre-and-tube setup, carry a compatible spare inner tube, two tyre levers and a mini-pump or CO₂ inflator. Check tyre width, valve type and valve length. A spare tube with a short valve may be useless on a deep-section rim.
A mini-pump offers repeatable inflation without relying on cartridges, although reaching road-bike pressure can take effort. CO₂ is quicker but finite. If you rely on it, practise using the inflator and check that the cartridge is compatible.
Tubeless riders should consider a suitable plug kit. Sealant can close some small punctures, but larger holes may need a plug or an emergency inner tube. Make sure you know how to remove the tubeless valve and that your tyre-and-rim combination permits the repair method you intend to use.
Use this simple roadside decision process:
- Small puncture in a tubed tyre: Stop safely, remove the wheel, inspect the tyre for the cause, replace or patch the tube, then reinflate.
- Tubeless puncture that won’t seal: Use an appropriate plug if the damage and tyre manufacturer’s instructions permit it. Otherwise, consider fitting a tube.
- Cut or damaged tyre casing: A tyre boot may allow a temporary low-stress journey if the damage is minor and the tyre remains structurally sound. Serious sidewall damage means arranging assistance.
- Broken chain: A compatible quick-link and chain tool may help if you know the repair procedure. Check the drivetrain before continuing.
After fixing any puncture, inspect the tyre and wheel before riding again. A successful inflation does not guarantee that the tyre is safe.
What a multi-tool can and cannot fix
A useful cycling multi-tool should fit the bolts on your own bicycle. Many modern road bikes use hex fittings and Torx bolts, so check your stem, seatpost, bottle cages and accessories rather than buying tools based on the number of functions advertised.
A chain tool and speed-compatible quick-link can be worthwhile for riders who know how to use them. A loose bottle cage or misaligned saddle is usually straightforward to correct. Damaged carbon components, brake-system failures and a badly bent derailleur hanger are not problems to improvise your way through.
When to stop riding and arrange a pickup
Stop if the bike cannot be made mechanically safe. Examples include compromised brakes, a cracked frame, a severely damaged wheel or a tyre that cannot hold pressure securely.
Move completely off the roadway where possible. Don’t continue just because you’re close to your distance goal. If the situation cannot be resolved safely, contact event support or your arranged pickup and provide your location.
Where everything goes
Good packing is partly about weight, but mostly about access. You should not need to empty a saddle bag every time you want a snack, nor should you risk dropping your phone while reaching for food.
Saddle bag versus jersey pockets
A simple three-pocket arrangement works well with a small saddle bag:
- Saddle bag: Spare tube, tyre levers, multi-tool, quick-link, tyre boot and a small amount of emergency cash.
- Left jersey pocket: Food for the first half of the ride.
- Centre jersey pocket: Packable jacket, gilet or arm warmers, depending on conditions.
- Right jersey pocket: Phone in a waterproof pouch, identification and additional food.
- Bike frame: Two securely mounted bottles, lights and a securely mounted pump or inflation kit.
Check that nothing can fall out when you lean forward or stand to climb. A frame bag is a reasonable alternative if your clothing lacks pockets, but bulky storage is rarely necessary for a supported 100 km event.
The trade-off between extra weight and practical value is easier to judge when you consider the consequences of not having an item.
| Optional item | Space and weight trade-off | Worth carrying when |
|---|---|---|
| Second spare tube | Small but noticeable extra bulk | Riding remotely, on rough surfaces or with limited assistance |
| Compact power bank | Adds weight and cable clutter | Phone navigation or battery life is a genuine concern |
| Packable rain shell | Uses a jersey pocket | Rain, wind or long descents are possible |
| Tyre boot and chain quick-link | Very little space | Compatible with your bike and you know how to use them |
| Large assortment of spare parts | Significant bulk | Rarely justified for an ordinary 100 km road ride |
What stays in the car or event bag
If you’re travelling to an organised fondo, keep clean clothes, dry socks, comfortable shoes and a towel in your vehicle or permitted event bag. A spare bottle, additional snacks and a floor pump can be useful before the start.
Check whether the organiser provides bag storage and whether you can access it at the finish. Don’t assume unattended bags will be transported or secured.
These supplies improve the day without occupying valuable space on the bicycle.
Three example packing setups
There is no single perfect 100 km packing list. The following examples show how the same basic equipment changes with support, terrain and weather.
A supported summer 100 km fondo
Imagine a paved event with staffed aid stations, moderate climbing and a forecast of mild, dry conditions. You expect around four to five hours of riding.
Carry: Two bottles, practised ride food, a spare tube, tyre levers, inflation equipment, multi-tool, phone, ID, payment method, lights and sunscreen. Add a lightweight wind layer if the morning is cool or the route has exposed descents.
Before leaving: Confirm what each aid station provides. If the event offers water but no preferred sports drink, bring your own drink mix in measured portions.
Leave behind: Heavy tools, multiple jackets and large amounts of spare clothing. Keep post-ride supplies in the car or event bag.
Mechanical support is reassuring, but a small puncture may be quicker to fix yourself than waiting for assistance.
A rural Vancouver Island training loop
Now consider a solo ride linking quieter roads around Sooke, Shawnigan Lake or the Cowichan Valley. Shops may be widely spaced, and parts of your route may have limited mobile reception.
Start with the supported-ride kit, then consider a second tube, a tyre boot, additional food and enough water to reach your next confirmed refill. Carry an offline route and identify possible pickup locations before setting out.
Surface choice matters. The Galloping Goose Regional Trail includes paved and gravel sections and is shared with other users. A bike suitable for a smooth road fondo may need different tyres or a revised route for a mixed-surface training day.
Check current Capital Regional District trail notices before using it. Construction, temporary closures and signed detours can alter both your distance and your access to services.
One particularly useful preparation is to identify a shorter return option around the halfway point. If weather changes or fatigue develops, turning back or shortening the route is better than becoming committed to a remote final section.
A cool, wet ride with uncertain conditions
For a long ride starting in cool coastal weather, clothing becomes a larger part of the packing decision. A breathable rain shell, suitable gloves and a thin insulating layer may matter more than a second multi-tool.
Keep your phone and spare clothing protected from water. Consider a small waterproof bag for dry gloves or another essential layer if the conditions justify it.
Wet roads can also mean more road debris, reduced visibility and longer stopping distances. Check your tyre condition and brakes carefully, carry reliable lights and allow more time for the ride.
If the forecast suggests conditions beyond your equipment or experience, change the route or postpone the training ride. Extra clothing cannot compensate for unsafe road conditions.
The final two-minute bike and bag check
Do this immediately before leaving, even if you packed the night before. It’s much easier to correct a small oversight at home than 40 km into the ride.
- Tyres: Check pressure, visible cuts and embedded debris. Inspect the tyre seating and valve.
- Brakes: Confirm both brakes work correctly and nothing rubs unexpectedly.
- Drivetrain: Check that the chain runs smoothly and shifting works.
- Wheels and attachments: Confirm that wheels, bottle cages, bags and mounted equipment are secure.
- Repair kit: Verify that the spare tube, levers, pump and tools are actually packed.
- Food and water: Fill both bottles and count the food you’ll need before your next reliable stop.
- Electronics: Check phone, GPS and light batteries. Load the correct route.
- Weather: Review the latest forecast and take the layer you’re most likely to need.
- Safety and logistics: Put on your helmet, carry identification and confirm your return or pickup plan.
One final test: can you fix a puncture with the kit you’re carrying, reach your planned refill stops and get home if the ride ends early? If the answers are yes, your packing is probably close to right.
The goal isn’t to carry everything that might possibly be useful. It’s to have the right equipment for the problems you’re reasonably likely to encounter, know how to use it and leave enough room to enjoy the ride. A well-prepared 100 km day should feel like cycling, not moving house by bicycle.